
DLT Registration Process on Airtel DLT Platform | Airtel DLT

Are you planning to send bulk SMS messages via Airtel DLT but feeling unsure about the DLT (Distributed Ledger Technology) registration process? Don’t worry—we’ve got you covered with all the essential details!
Why is Airtel DLT Registration Important?
If you want to use the Airtel Bharti platform for sending bulk SMS, completing DLT registration is a mandatory requirement. It ensures:
- Authenticity: Your messages are verified and genuine.
- Traceability: Messages can be tracked efficiently.
- Security: Both sender and recipient are protected from fraudulent activities.
With proper DLT registration on the Airtel platform, you can send secure, authenticated bulk SMS messages without any issues.
Airtel DLT registration Process
Before starting your Airtel DLT registration, ensure you have the following documents and details ready to streamline the process:
Required Documents for Airtel DLT Registration
- Company PAN Card: A valid PAN card for your business entity.
- Business Registration Proof: Any one of the following : GST Certificate/ TAN Certificate/ FSSAI License/ Memorandum of Association/ Incorporation Certificate/ Shop Registration Certificate
- Authorized Person’s Government ID: A valid ID proof such as: PAN Card/ Driving License/ Voter ID/ Aadhaar Card
- Contact Details: Valid Email Address, Active Phone Number (You’ll receive an OTP during registration)
- Authorization Letter: A declaration on the company letterhead, signed and sealed by the principal partners or directors.
Step-by-Step Guide for Registering on Airtel DLT Platform
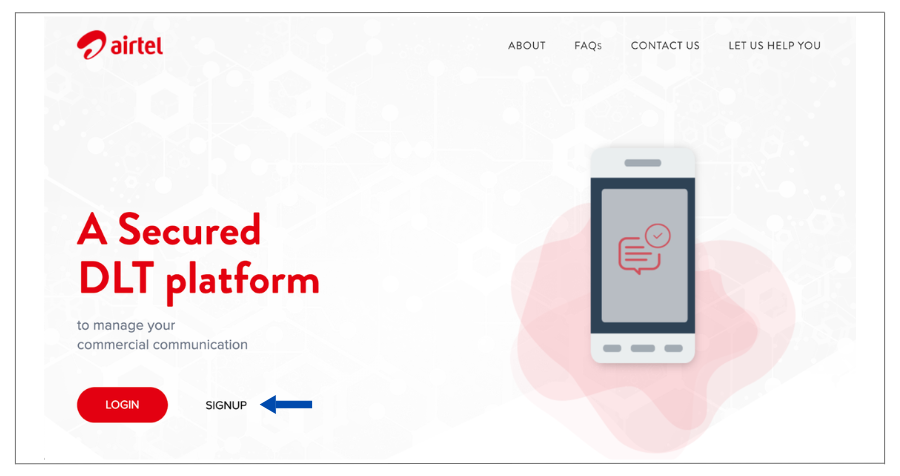
Step 1: Visit the Airtel DLT Portal:
- Open your browser and go to https://dltconnect.airtel.in/.
- Click on “Sign Up”.
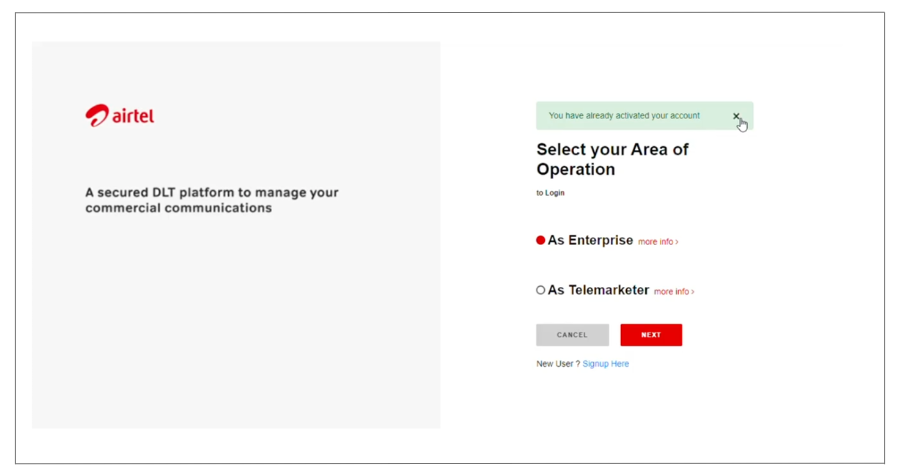
Step 2: Select Enterprise Account:
- Choose “As Enterprise” and click “Next”

- A pop-up will appear; select “Yes” to proceed.

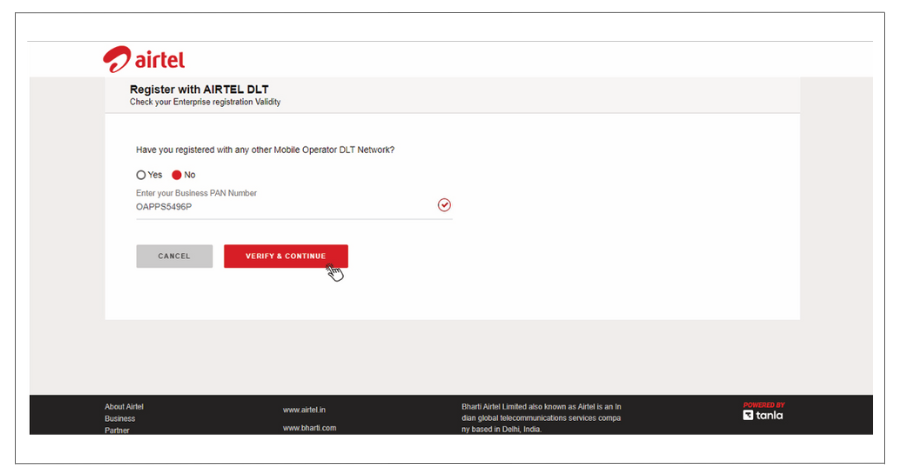
Step 3: Registration Question:
- If registered with another DLT network, select “Yes” and enter your Enterprise ID.
- If not, then select “No” and enter your Business PAN Number.
- Click “Verify & Continue”
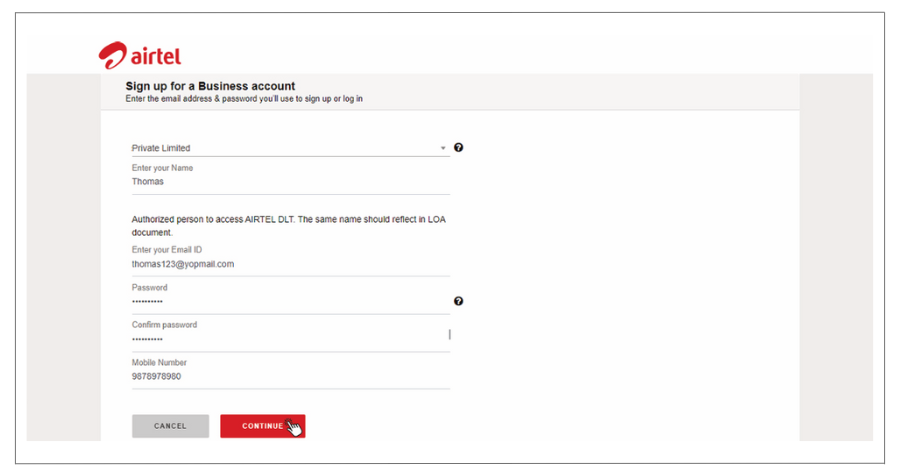
Step 4: Business Information:
- Select your Business Type from the dropdown menu.
- Enter your Name and create your Login Details.
- Click “Continue”.
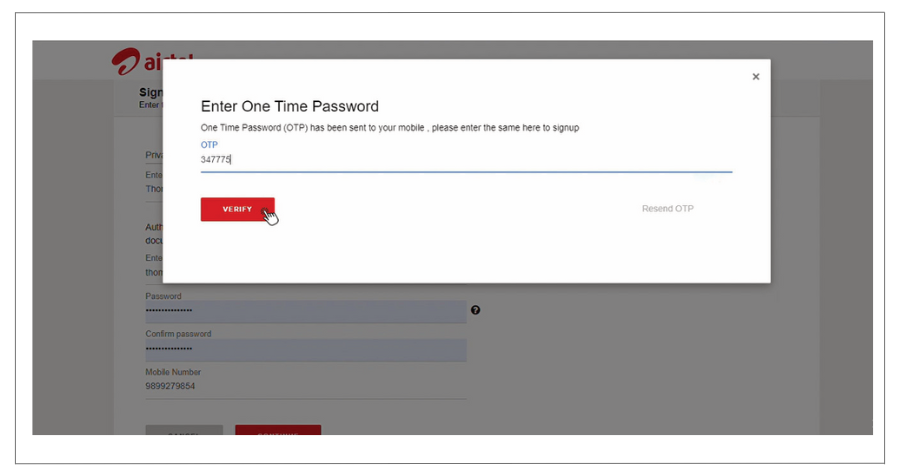
Step 5: Verify OTP:
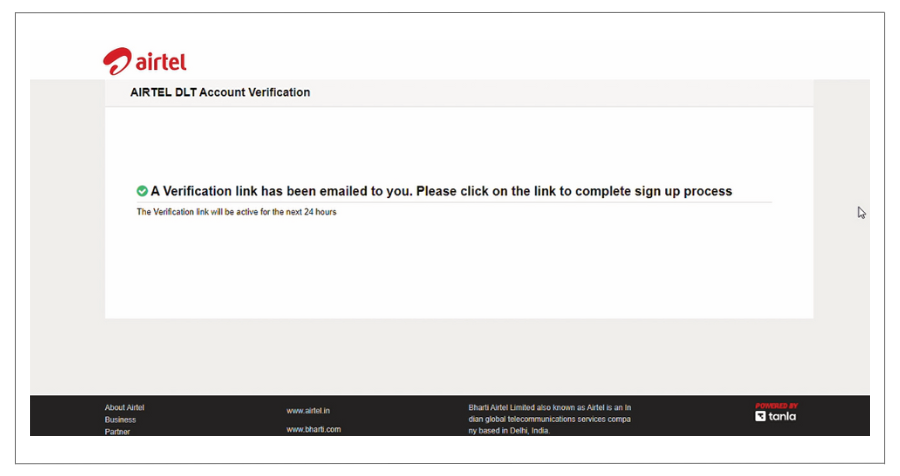
- Enter the OTP sent to your registered mobile number.
- Verify your Email using the verification link sent to your inbox.
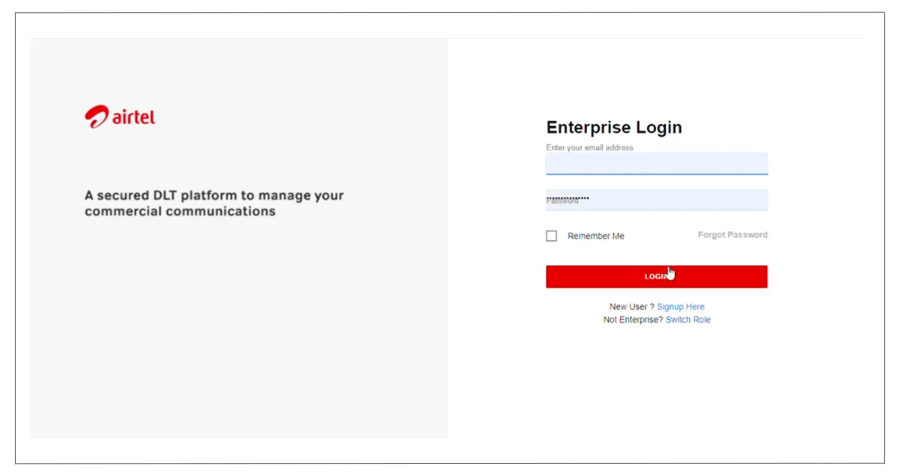
Step 6: Login to Your Account:
- Go back to the portal and click “Login”.
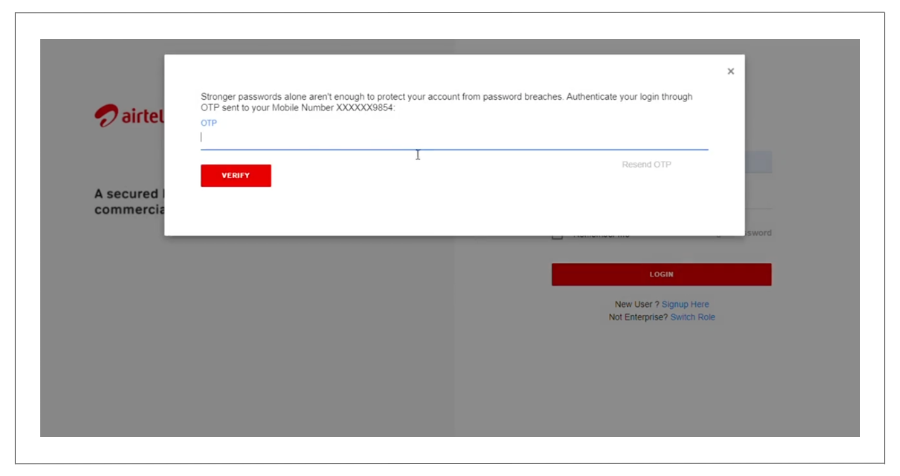
- Enter your Email and Password.
- Verify using the OTP sent to your mobile number.
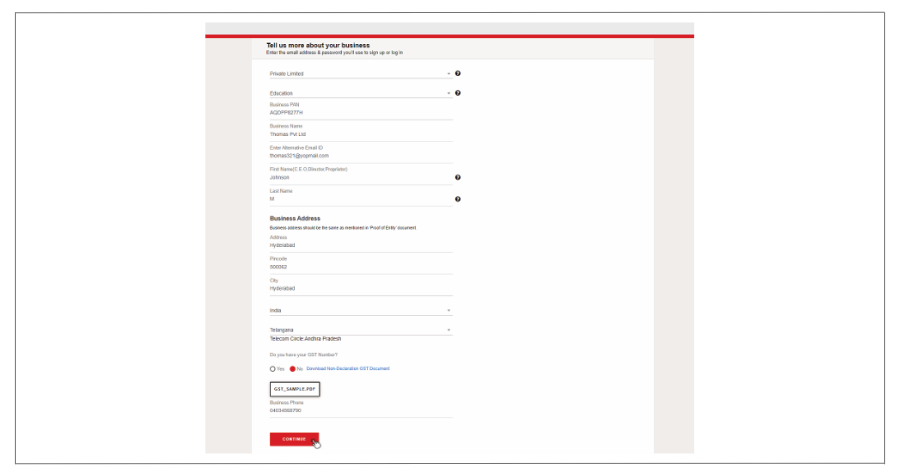
Step 7: Fill in Business Details:
- Provide your Business details and Address (ensure it matches the one on your PAN card).
- Click “Continue”.
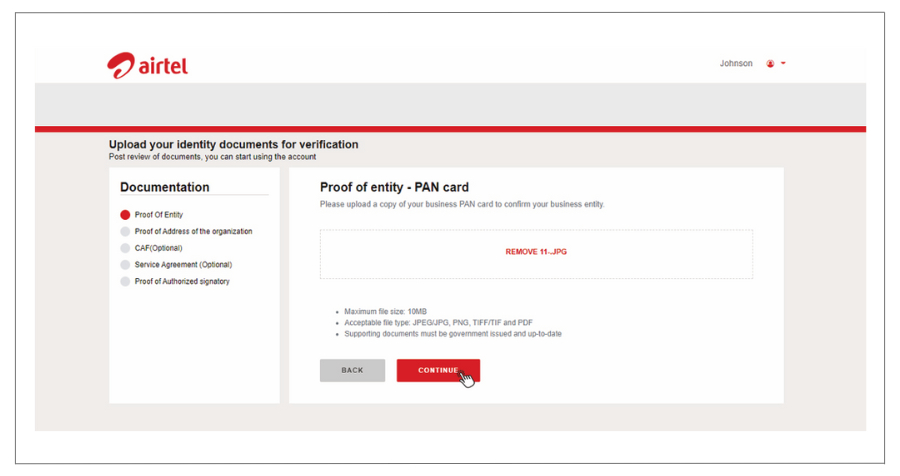
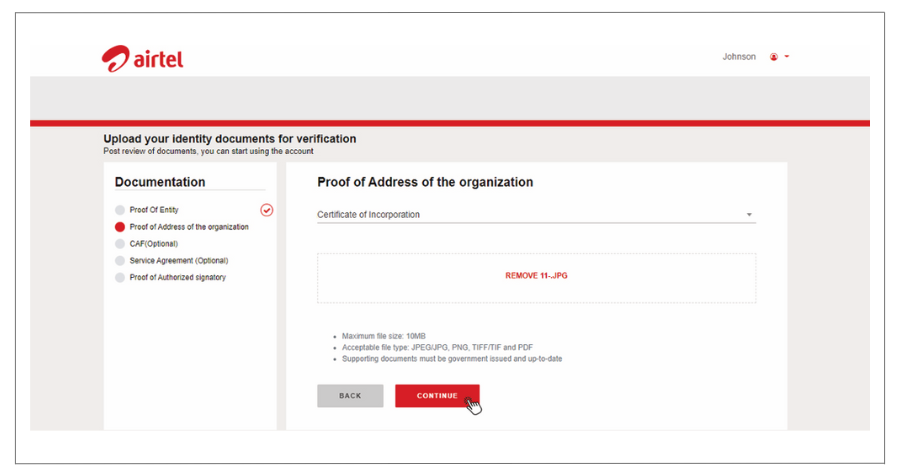
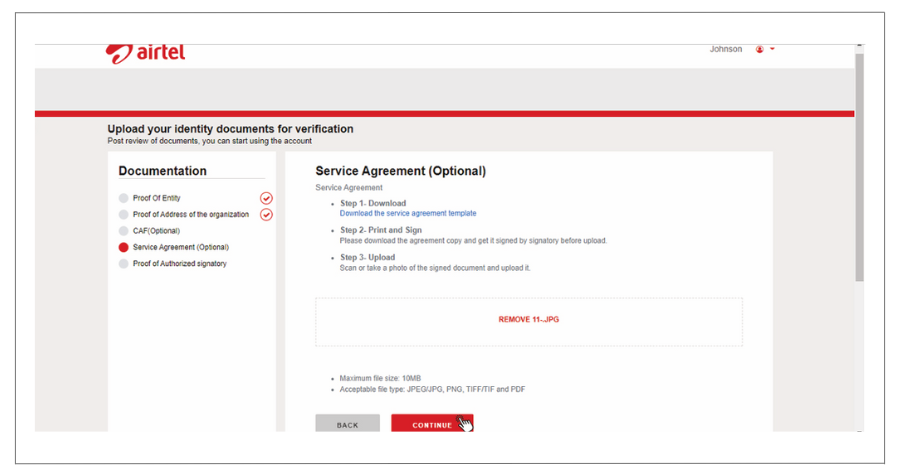
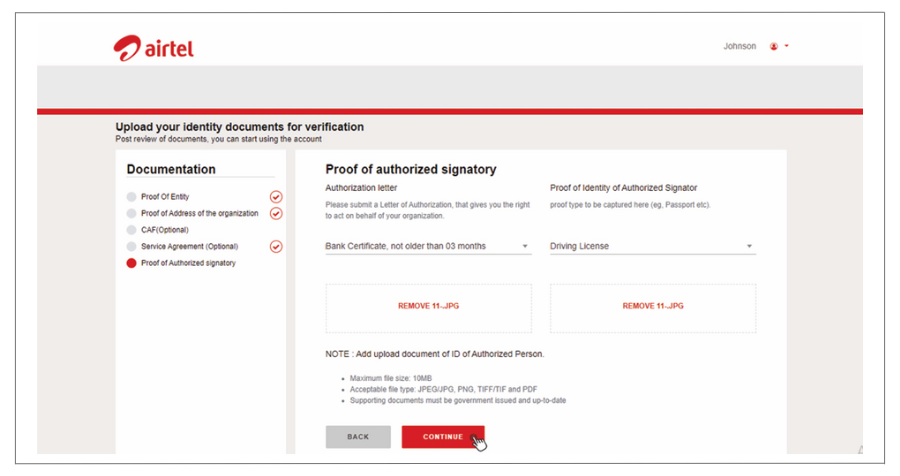
Step 8: Upload Required Documents:
- Proof of Entity
- Proof of Business Address
- Service Agreement (Optional)
- Proof of Authorized Signatory (Mandatory)
Step 9: Submit for Approval:
- Once all documents are uploaded and details are filled, submit your registration.
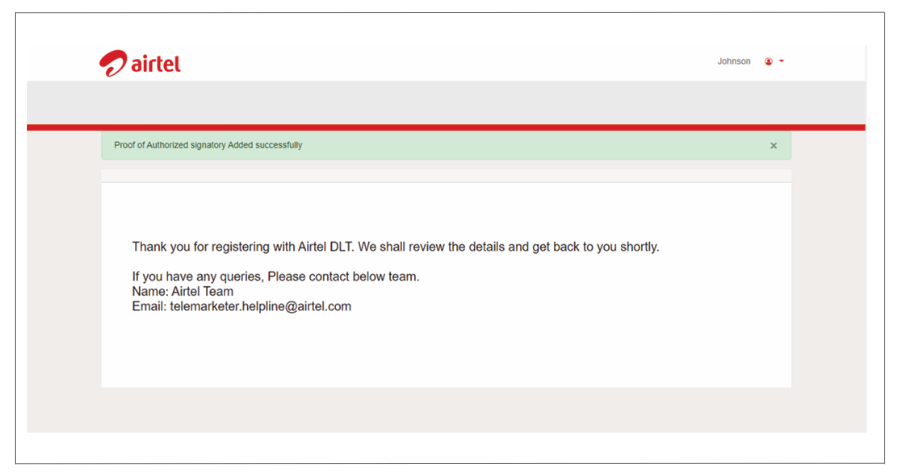
Step 10: Await Approval:
- Your registration will be reviewed by Airtel DLT authorities.
- Upon approval, you’ll receive an Email Confirmation.
Congratulations! You’ve successfully completed the Airtel DLT registration process.
Ready to Transform Your Business Communication?
Connect with your customers instantly through powerful messaging solutions. From Bulk SMS to WhatsApp automation, we help businesses communicate smarter and grow faster.